Originally published on the Jot That Down Blog
Introduction
Multi-cluster Kubernetes is one of those problems that sounds straightforward until you actually try to solve it. Every solution I looked at required a central control plane, a VPN, a service mesh, or all three. I wanted something simpler: two clusters that can trust each other, talk to each other, and run each other’s workloads with nothing in between.
That’s what Porpulsion is. It’s a lightweight, decentralized Kubernetes connector. Each cluster runs a small Python agent. Agents peer with each other through a one-time certificate exchange, then stay connected over a persistent WebSocket channel secured with mutual TLS. Once peered, you can deploy containerized workloads to any peer cluster directly from the dashboard with no kubectl context switching, no shared control plane, and no extra infrastructure.
This post walks through how it works, how to get it running locally, and how to deploy it in production.
The Problem with Multi-Cluster Kubernetes
If you’ve tried to run workloads across multiple clusters you’ve probably hit options like:
- Cluster Federation: heavyweight, hard to operate, largely deprecated
- Service Mesh (Istio/Linkerd): powerful but complex, significant overhead
- VPN tunnels: works but adds another thing to manage and break
- GitOps tools: great for GitOps workflows but not peer-to-peer workload submission
Porpulsion is none of these. It’s built for situations where you want to say “run this container on that cluster” from a web UI and have it just work. A CustomResourceDefinition (RemoteApps) and controller are also in active development, so workloads can be managed via kubectl apply and standard Kubernetes manifests alongside the UI.
Architecture
Each cluster runs a single agent that exposes two ports:
- Port 8000: Dashboard UI, REST API, and WebSocket endpoint (internal only)
- Port 8001: mTLS peer handshake server (exposed via Ingress)
After initial peering, all inter-cluster traffic (workload submissions, status updates, log streaming, HTTP proxying) flows over a single persistent WebSocket connection per peer pair. No per-request TLS handshakes.
Cluster A (agent)  <- WebSocket over mTLS ->  Cluster B (agent)
  - submit apps                                 - execute workloads
  - view status                                 - stream logs back
  - proxy HTTP                                  - enforce quotas
State is persisted in Kubernetes Secrets and ConfigMaps, so agent restarts are transparent.
Peering
Peering is a one-time operation. Here’s what happens:
- Agent A generates a single-use invite token
- Agent B sends its CA certificate and the token to Agent A’s peer endpoint
- Agent A verifies the token and stores Agent B’s CA fingerprint
- Both agents display the peer’s CA fingerprint for operator verification (MITM prevention)
- Once confirmed, a persistent WebSocket channel is established
After that, the token is rotated and the CA fingerprint is pinned. All future communication is authenticated by verifying the CA in the WebSocket X-Agent-Ca header against the stored fingerprint.
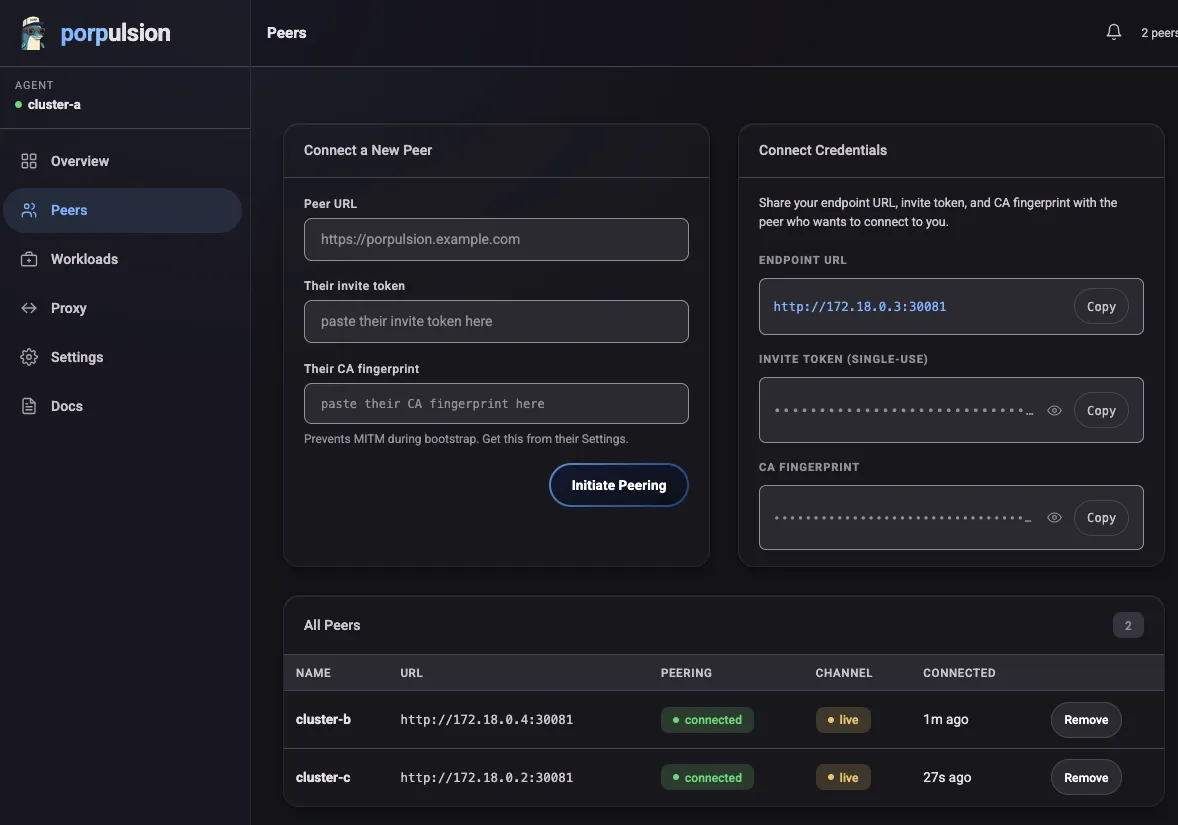
Peers page with a connected peer channel. In local dev the channel indicator appears yellow (unencrypted ws://); in production over HTTPS it shows green.
Deploying Workloads
From the dashboard you fill out a form with your container spec (image, resources, environment variables, ports, readiness probes, security context) and submit it to a peer cluster. The spec is sent over the WebSocket channel and the peer agent creates a Kubernetes Deployment.
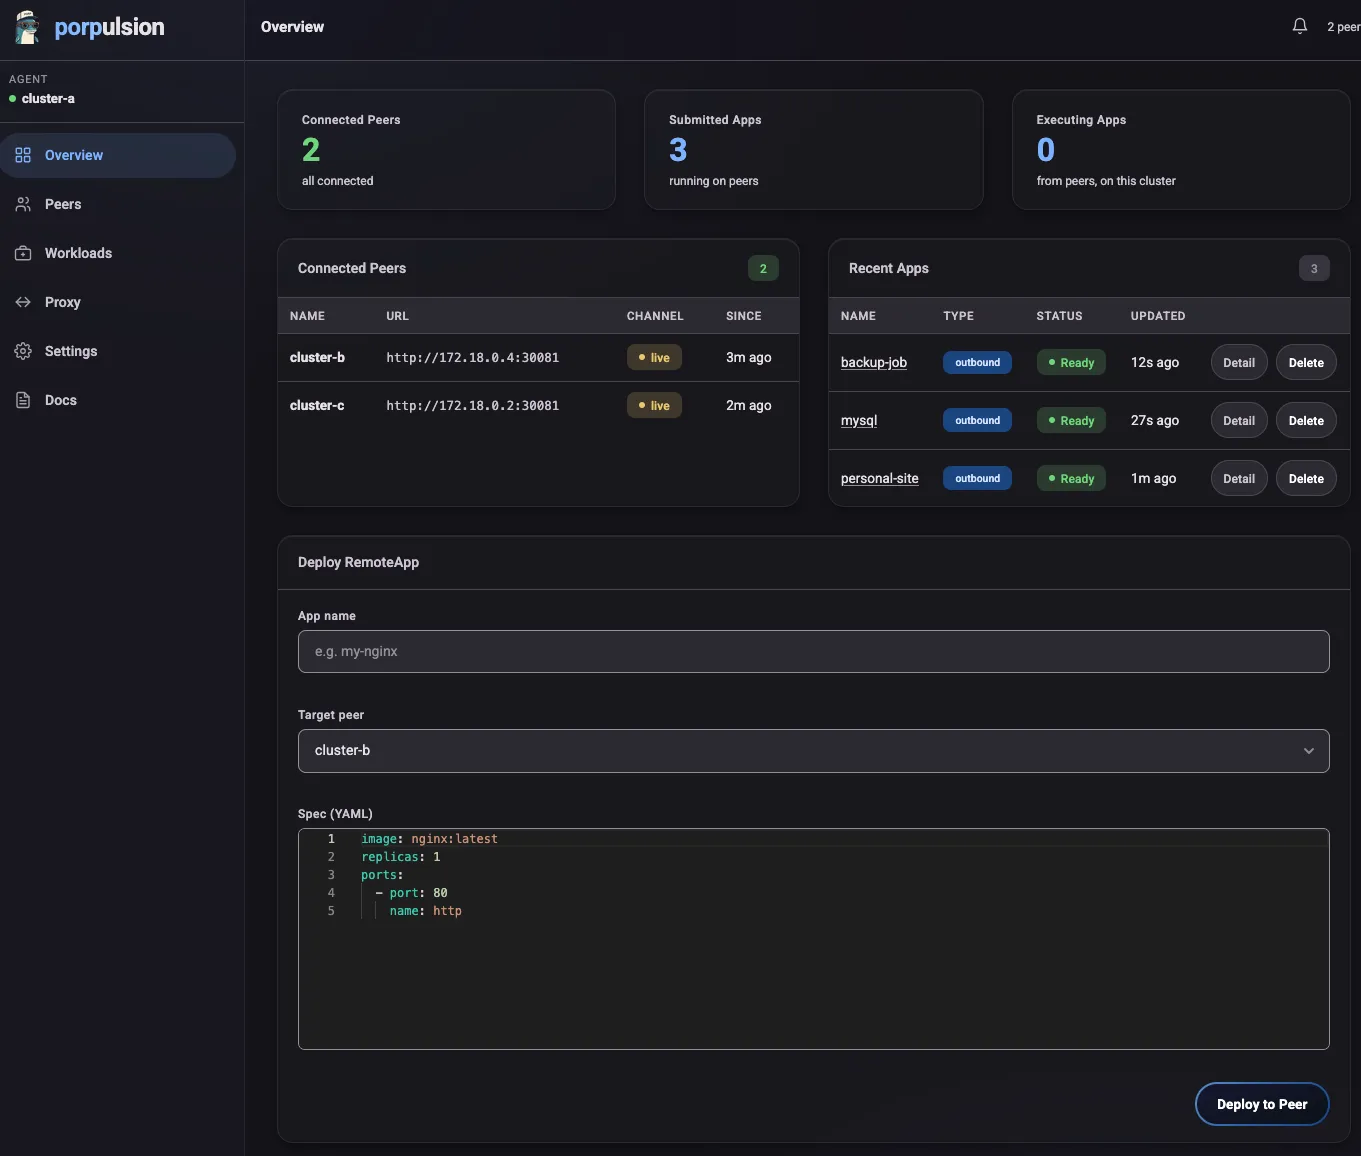
Status flows back over the same channel: Pending -> Running -> Ready. If a pod fails to become ready within the timeout, you get a notification.
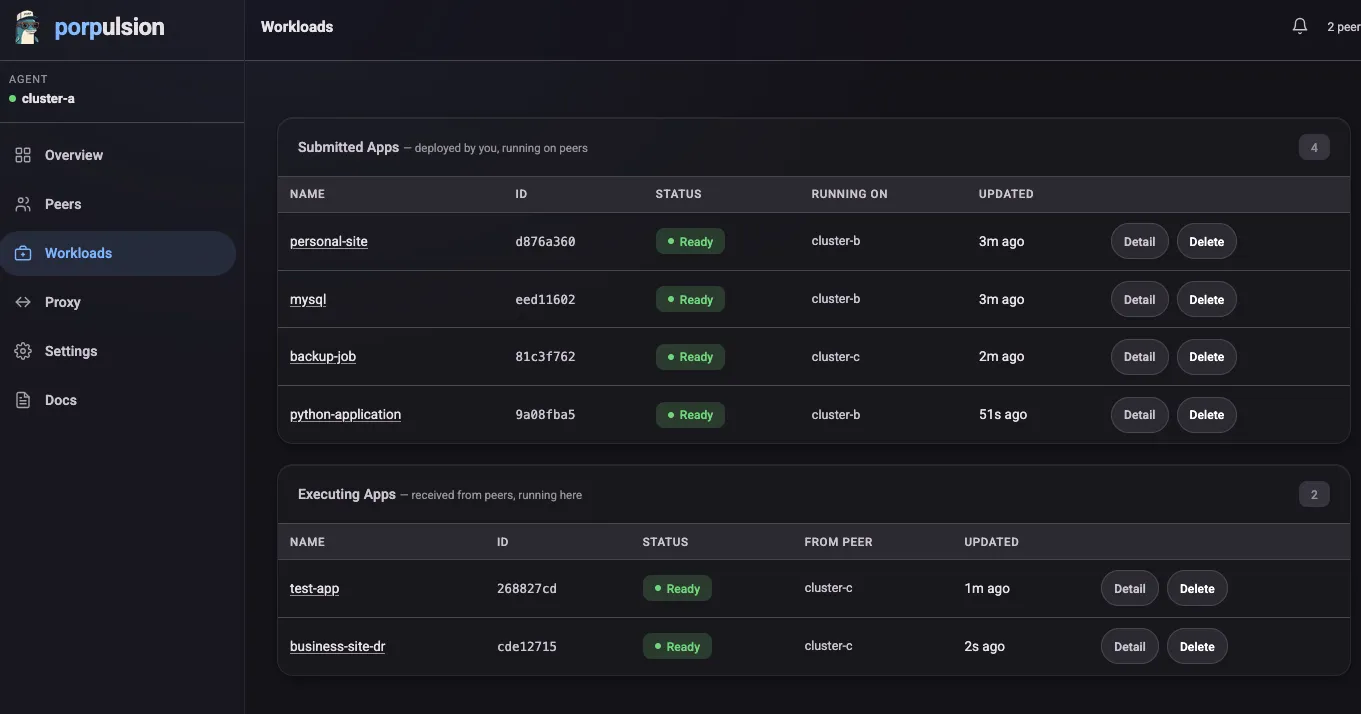
You can scale, update the spec, or delete the workload at any time from the Workloads page.
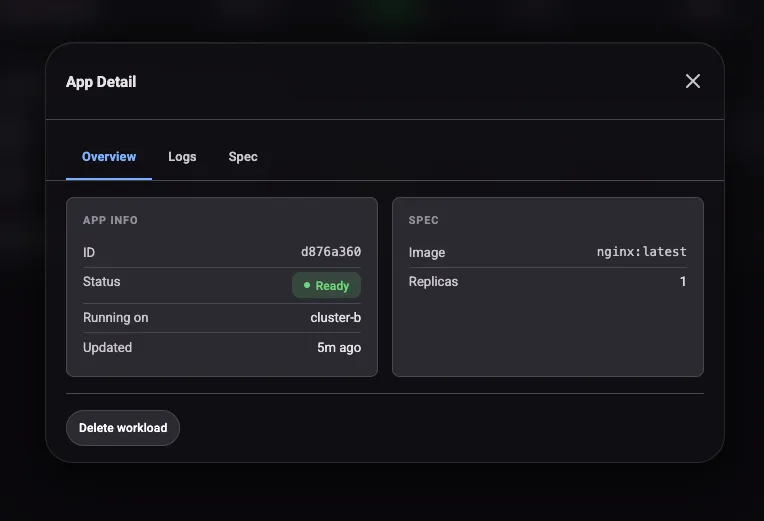
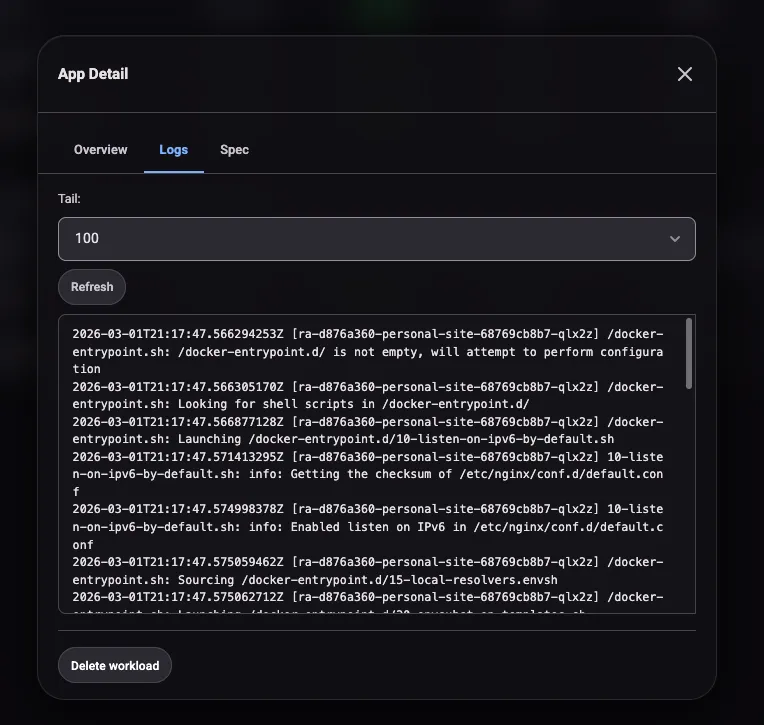
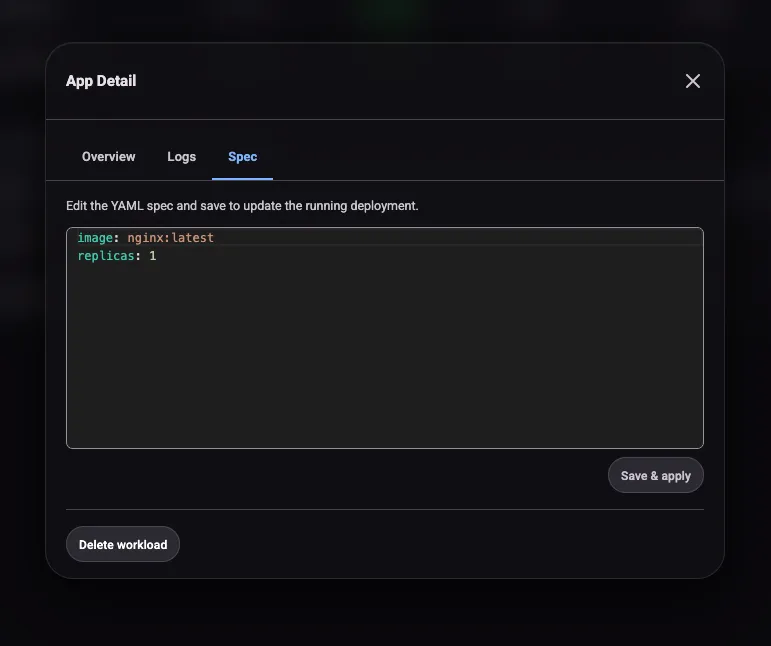
Clicking into a workload opens a detail modal with three tabs. Overview shows replica status, image, and resource requests. Logs streams pod output from the executing cluster. Spec shows the full workload definition as submitted. The logs tab is handy for debugging startup failures without needing to kubectl exec into the remote cluster.
HTTP Proxy Tunneling
Once a workload is running on a peer cluster, Porpulsion creates a proxy URL on the submitting cluster:
https://your-agent/api/remoteapp/<id>/proxy/<port>/
HTTP requests to that path get forwarded over the WebSocket channel to the executing cluster, which routes them to the pod. No additional ports need to be exposed on the executing cluster. Useful for accessing internal services, admin interfaces, or health endpoints without making them public.
Access Control and Quotas
Each agent has its own settings for what it will accept and execute:
- Image policies: allowlist or blocklist image prefixes (e.g., only allow
ghcr.io/myorg/) - Source peer filtering: restrict which peers can submit workloads
- Approval workflows: manual approval queue before any workload runs
- Resource quotas: per-pod CPU/memory limits and aggregate cluster limits
- Tunnel approval: control which peers can proxy through you
Each agent enforces its own policy independently, so you can run Porpulsion across clusters with different owners and different rules.
Getting Started Locally
The local dev setup spins up three k3s clusters in Docker. No real Kubernetes needed.
Prerequisites: Docker and Docker Compose
Terminal window
git clone https://github.com/hartyporpoise/porpulsion
cd porpulsion
make deploy
That command:
- Starts three k3s clusters via Docker Compose
- Builds the agent Docker image
- Helm-installs Porpulsion into all three clusters
After a minute or so the dashboards are at:
- Cluster A: http://localhost:8001
- Cluster B: http://localhost:8002
- Cluster C: http://localhost:8003
To peer two clusters, open Cluster A’s dashboard, go to Peers, and generate an invite token. Then open Cluster B’s dashboard, go to Peers -> Connect, and paste in Cluster A’s URL and token. Verify the CA fingerprints on both sides and you’re connected.
Other useful Makefile targets:
Terminal window
make redeploy   # Rebuild image + helm upgrade (clusters stay running)
make logs       # Tail agent logs from both clusters
make status     # Show pod and peer status
make teardown   # Tear everything down
Production Deployment
For production you’ll need:
- A Kubernetes cluster with an ingress controller
- An externally reachable hostname for each agent (for WebSocket peering)
Install with Helm:
Terminal window
helm upgrade --install porpulsion oci://ghcr.io/hartyporpoise/porpulsion \
  --create-namespace \
  --namespace porpulsion \
  --set agent.agentName=my-cluster \
  --set agent.selfUrl=https://porpulsion.example.com
Key values:
agent.agentName:human-readable name for this clusteragent.selfUrl:the externally reachable URL peers will use to connect (must behttps://)
Your Ingress needs to support WebSocket connections. Add these annotations:
nginx.ingress.kubernetes.io/proxy-read-timeout: "3600"
nginx.ingress.kubernetes.io/proxy-send-timeout: "3600"
nginx.ingress.kubernetes.io/websocket-services: "porpulsion"
Route /peer and /ws to port 8001, and keep the dashboard port-forwarded locally. Don’t expose it publicly.
The API
Every action in the UI is backed by a REST API with a full OpenAPI 3.0 spec. Good if you want to automate deployments, integrate with CI/CD, or build tooling on top of Porpulsion.
Reconnection and Resilience
The WebSocket channel handles disconnections on its own:
- Exponential backoff reconnection: 2s -> 4s -> 8s -> 16s -> 30s (resets on success)
- Both peers attempt to reconnect independently
- Workloads keep running on the executing cluster even if the channel drops
- Status syncs when the channel comes back up
You can test this by restarting one of the local dev agents. It reconnects and syncs state on its own.
What’s Next
The roadmap includes:
- CRD controller:
kubectl apply -f remoteapp.yamlsupport - CLI:
porpulsion peer add,porpulsion app deploy - Leaf cert rotation: without re-peering
- HA mode: leader election for multi-replica agents
Conclusion
Porpulsion is for deploying containers across Kubernetes clusters without standing up a full multi-cluster platform. No central component to manage, no VPN to configure, no service mesh. Each agent is self-contained and the persistent WebSocket channel keeps things fast.
If you run multiple clusters (home lab, multi-region, dev/staging/prod) and want a lightweight way to share workloads between them, give it a try.
The code is open source at github.com/hartyporpoise/porpulsion. The Helm chart is published to oci://ghcr.io/hartyporpoise/porpulsion.